ASN3
Drone Search and Rescue!
Deadline
October 14, 2021 at 11:59:59 PM. Only one submission per group.
What you need to do?
Since you did so well in ASN1 and ASN2, you have now upgraded your robot's sensor suite. You now have a RGBD camera or a camera that gives aligned (on image) the color RGB image and a separate depth image. An example of such a sensor is the
Microsoft Kinect, however a lot more alternatives such as the
Intel RealSense D435i exist. A few more depth sensors can be found on
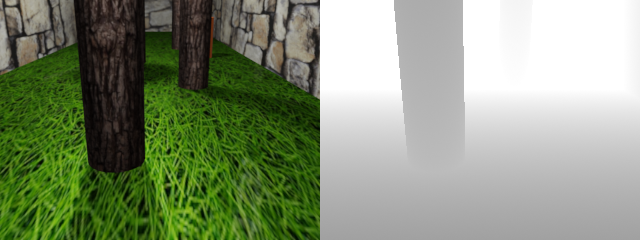
my awesome Robotics Hardware collection page. Note that a real depth camera data is noisy, but to make our life simple, our depth camera is perfect, i.e., it has no noise. See Fig. 1 for a sample image of our simulated "perfect" RGB-D sensor. Here, the left half shows the RGB (color) image and the right half shows the depth image/map where brigther color means far and darker color means near (The mapping of the value has depth range of 0 to 20 m and is represented as floating point numbers). We generally denote the RGB image as \(\mathcal{I}\) and the depth image as \(\mathcal{D}\).

Fig. 1: Sample output of our simulated "perfect" RGBD camera.
Your task is to use data from the drone's RGBD camera to navigate through a forest and stop near (within 2 m distance, already programmed in for you) the Survivor from ASN2 (You don't need to use your detector from ASN2, instead we magically obtain a distance to goal, which is given by the
DistToGoal parameter. You'll in particular write a perception (vision) algorithm to detect free-space to avoid collision by moving left/right (you only control the movement or velocity in \(X\) direction) into the trees and barrels (Just using the
image for this might be a simple solution, but you can get creative by using RGB frames as well).
Download Data
The blender file along with its supporting files and the Controller.py starter script can be downloaded as a .zip file from
here.
A few more details about the simulation/Blender setup are given in the following sections, please understand them before starting the project.
Robot/Drone Dynamics
The drone in this project is a trivialized approximation of the real world. Instead of simulating the actual physics of how propellers generate thrust and how the drone behaves to changes to its motor speeds, we make the assumption that the robot is a simple point object with perfect control and no aerodynamic drag. In particular, the drone maintains it's altitude perfectly at 5 m and it's forward velocity is fixed at 1 m/frame. You need to control the drone to move left/right and the amount it needs to move left/right to avoid collisions and reach the goal.
RGBD Data
Like we said before, the drone is equipped with an RGBD or a commonly called depth camera. You obtain both RGB images and depth images saved in their respective folders, these are read in the
VisionAndPlanner function. Please go have a look at it. In the depth map, brigther color means far and darker color means near (The mapping of the value has depth range of 0 to 20 m and is represented as floating point numbers).
Pitfalls AKA WTH is going on?!
Here are some common pitfalls you can avoid.
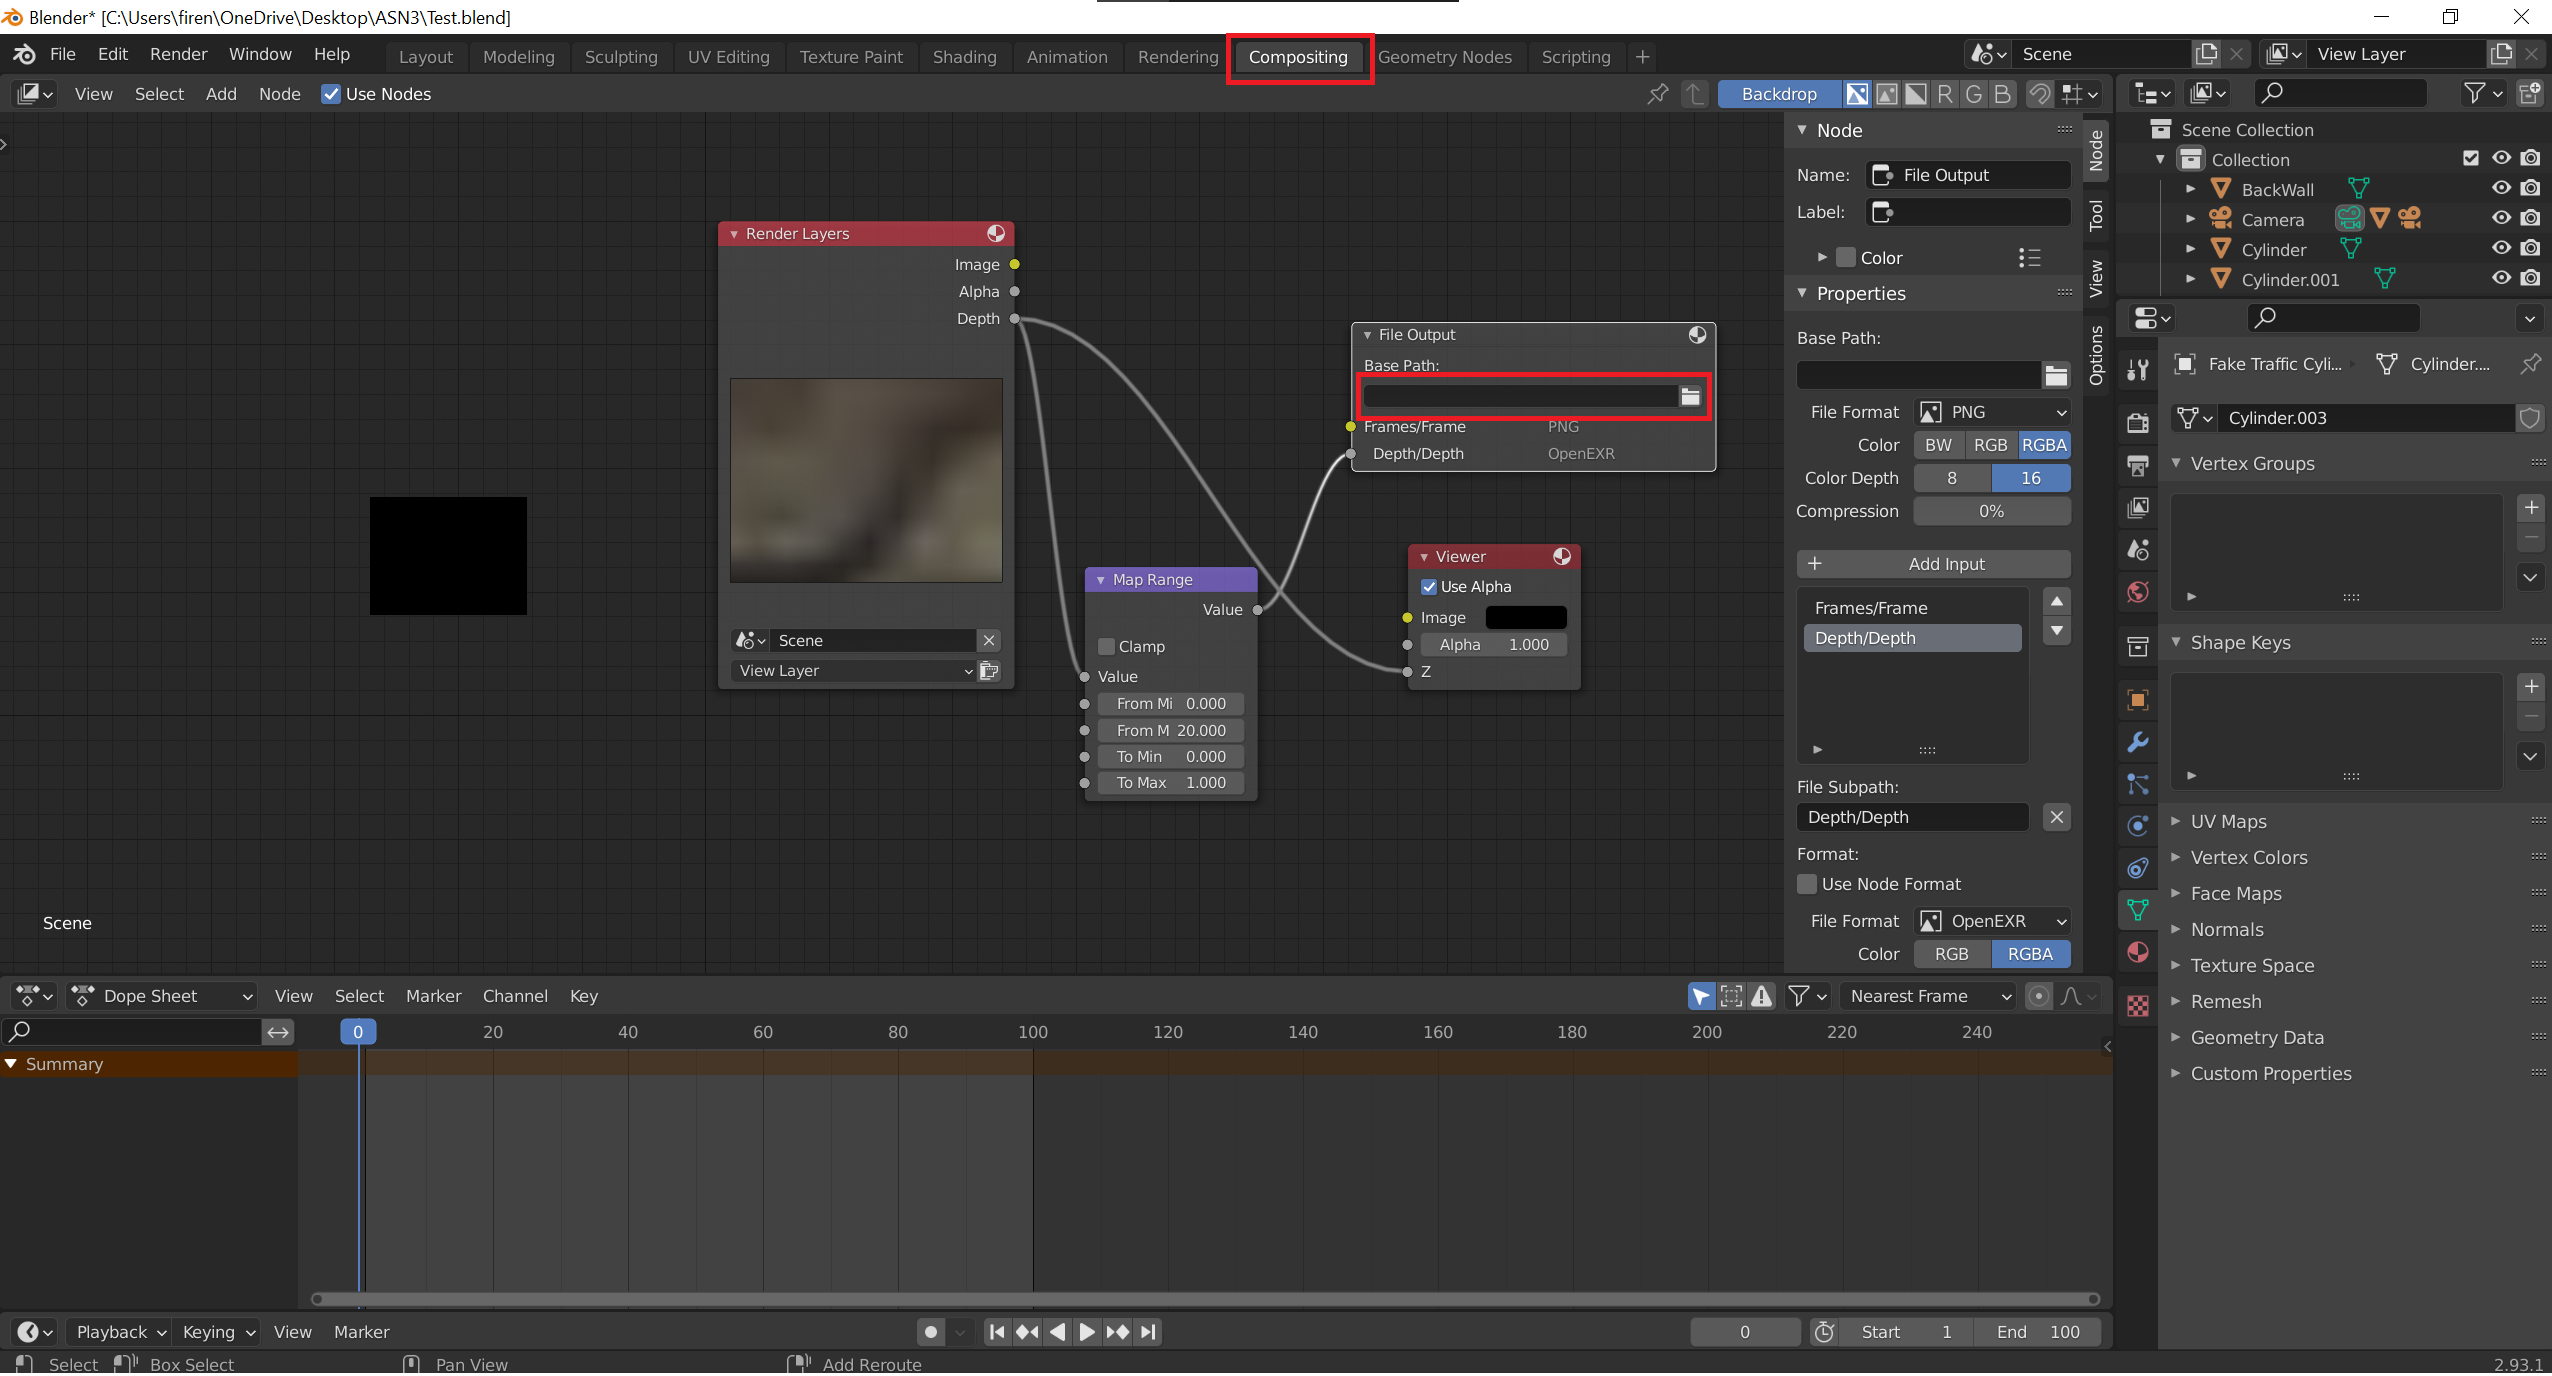
Did not set correct path in Compositing
You'll get an error like
OSError: Cannot read image file "Depth\Depth0000.exr". No such file or directory.
Please set the correct path in the place shown in Fig. 2.
Use the full path here not a relative path.

Fig. 2: Setting the path to save files.
I thought I saved my code, Blender crashed and I lost it!
You'll run into this issue for sure, the save command if you are using Scripting tab in Blender is
Alt + S as
Ctrl + S saves the Blend file but not the code.
Why do I have random extra frames?
You need to manually (or in code) delete the folder where the
Frames, Depth and
ThirdView is saved before each run. By default the script will only overwrite files that it creates. For eg., if in your first run, the code ran for 100 iterations, it'll create 100 files (numbers from 0 to 99) in each of the folders. Now, if your second run, the code ran for 50 iterations (numbers from 0 to 49), it'll only overwrite the first 50 files (numbers from 0 to 49) and leave the last 50 files untouched (numbers from 50 to 99).
Video Tutorial
Watch Chahat's tutorial in-case you missed class or didn't catch something
here. Then, watch
this video (also embedded below) before you start this project. It explains how the environment is setup and how to get started. Note, I am not supporting student laptops but I do give tips to make things work on Linux (Mac should be pretty similar to Linux) and Windows (a little painful).
Be sure to change the paths in lines 8 to 17 as per your computer or else the code won't work. As ASN2 recommended, follow setup instructions from
ASN2 Step 0 to install OpenCV. Follow
Blender installation guidelines from the official website.
Make your results better (Optional for Extra credit of upto 25%)
Now that you have a successful control policy to avoid obstacles and to reach the goal by issuing a control command based on every frame (this is also known as reactive control), you can you can be creative and fuse readings from multiple frames to get a faster control policy to reach the goal with lesser error.
Using third-party code
You are allowed to use any code available on the internet with an appropriate citation. However, you are not allowed to submit any other classmate's work as your own. Remember collabotation amongst classmates is encouraged but plagiarism is strictly prohibited.
What you need to submit?
A report in double column IEEE format (maximum of 6 pages) in LaTeX per group compiled into
.pdf, an
.mp4 video made from images of the
ThirdView folder (for your successful run) and another
.mp4 video made from images of the
Frames folder (for the successful run as the other video) and finally all your
.py code files to reporoduce your result all zipped together into one
.zip file.
I will deduct 25 points if I get multiple submissions from the same group (submitted by more than one person from your group not multiple iterations submitted by the same person).
Your report should be of
this quality in-terms of content detail. Particularly for ASN3, I expect the report to have mathematical equations (typeset in LaTeX not images obviously) describing your control policy and perception module. If your approach is more algorithmic,
then use algorithm (or some other similar package) package in LaTeX to format algorithms.
Your report should include the following:
- Names of the team members and the team
- Detailed description of your approach
- Failure cases or shortcomings of your approach
- Appropriate references for any methods or code used (you can use .bib files to make your life easier)
- Distribution of work amongst team-members
You can use any LaTeX tool you like, I would recommend
Overleaf as it is free and you can use it to collaborate online. If you are new to LaTeX, you can
learn from this awesome tutorial from Overleaf. Alternatively, if you want to work locally, you can use any of
these editors. The LaTeX template can be found
here. The submission should be made through ELMS with the name ASN3.

